
Crafting with dried flowers can be a heartfelt way to preserve memories and beautify your space. As I prepared some lovingly dried botanicals, I was struck by an idea why not transform them into a stunning Dried Flower Filled Globe Ornament? This charming project allows you to showcase your favorite blooms beautifully, whether they are remnants from a special occasion or flowers that you adore. Using a simple plastic globe and a few additional supplies, you can create an eye-catching ornament that brings a touch of nature indoors. You may also find Dried Flower Lantern Diy Tutorial Guide useful.
Why This Dried Flower Filled Globe Ornament Works So Well

You may also find Dried Flower Shadow Box Paper Butterfly useful.
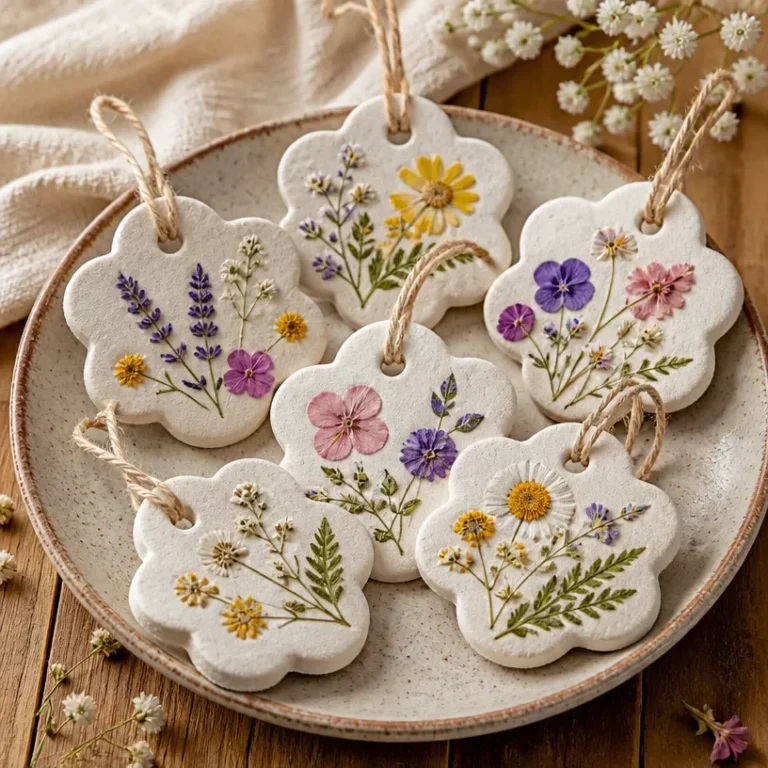
This project is approachable for all crafting levels, even if you’re a beginner. Utilizing just a few materials, you can quickly gather everything needed to start creating. The ornament is visually rewarding as it highlights the unique shapes and colors of the dried flowers, making them look even more stunning when confined within the globe’s clear boundaries. Moreover, this project allows you to achieve a beautiful display without the hassle of complicated techniques, making it easy to preserve and gift meaningful florals throughout the year. Perfect for any season, the Dried Flower Filled Globe Ornament is versatile and lovely. You may also find Pressed Flower Salt Dough Ornaments useful.
A Quick Look Before You Begin
Before diving into the crafting process, take a moment to envision how your ornament will come together. You’ll be filling the clear globe with thoughtful arrangements of dried flowers, which can include a wide range of petals, heads, and other botanicals. Expect a bit of mess, but it’s manageable and often adds to the fun of crafting. As you make your selections, consider the colors and shapes that appeal to you; the flexible setup offers a chance for personal expression. So, let’s get started on this delightful journey with just a few easy steps.
Materials You’ll Need
- 1 clear plastic fillable globe (3 inches) the foundation of your ornament that holds everything together
- 12 fully dried small petals or flower heads choose flowers that hold significance or beauty to you
- Thin twine (12 inches) perfect for hanging your creation securely
- Ribbon (8 inches) for a lovely bow that adds an extra touch of charm
- Manufacturer’s closure this keeps your floral treasure snug within the globe
Each material plays a critical role in the final design, so handle them with care to maintain their beauty throughout the crafting process.
Step-by-Step Directions

- Open the globe according to its closure design and inspect it for cracks. Keeping the empty halves or cap on a towel will prevent scratches.
- Choose fully dry flowers small enough to fit through the opening without crushing. Remove loose stems and any pieces that retain moisture to ensure they last.
- Place the botanicals loosely inside using tweezers, filling no more than about one-third of the space. This will keep individual flowers visible and prevent overcrowding.
- Close the globe using its original fastener and check that it stays securely shut when held upright. This is important for the overall look and longevity of your ornament.
- Tie twine through the built-in loop, then add a ribbon bow to the loop for a decorative finish. This not only looks delightful but also eases the hanging process.
- Hang from a branch that can support the ornament. Remember to keep it away from direct sunlight and heating vents no liquid or candles should go inside this dry botanical globe.
The Design Behind This Floral DIY
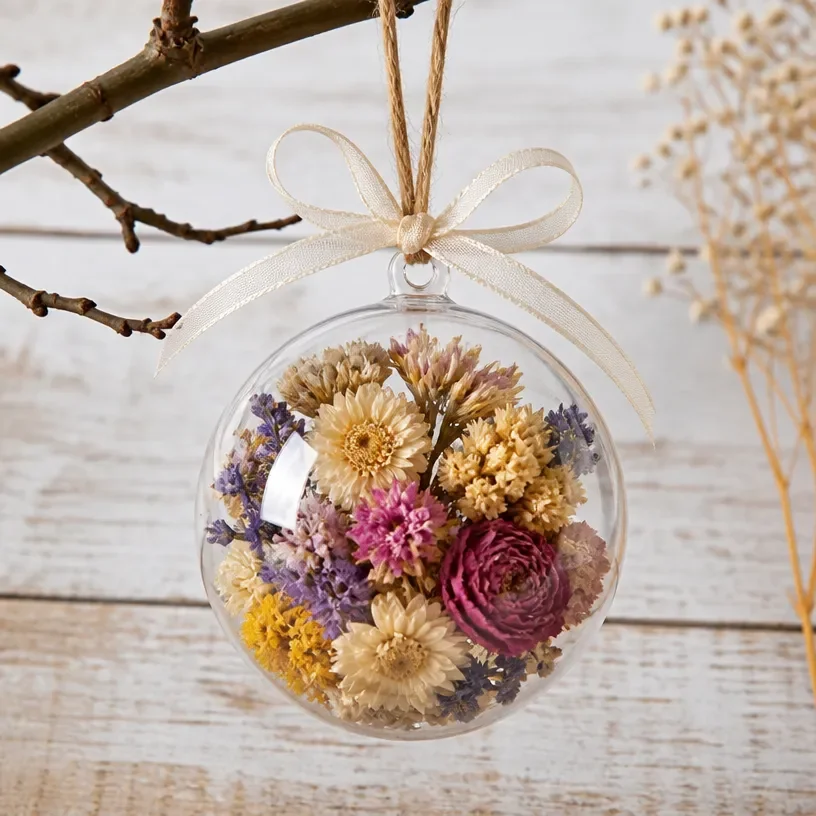
The beauty of the Dried Flower Filled Globe Ornament lies in its design flexibility. Consider the color relationships and textures of the flowers you choose. A careful arrangement will create a balanced look inside the globe. For instance, pairing softer blooms with vibrant ones can help to achieve a striking visual contrast, while varying textures might add another layer of depth. Ensure that flowers are spaced well so that each one can shine on its own yet create a cohesive composition overall.
Troubleshooting Common Issues
It’s not uncommon for things to go a little awry when you’re crafting. If you find that some flowers are shifting out of place, simply use tweezers to readjust them carefully. If the arrangement looks uneven, reexamine the placement and try to achieve a better balance by adjusting the flowers’ spacing. Don’t be discouraged if you notice some petals seem crowded; remember that taking a step back can often help you see a solution.
Easy Variations to Try
Feel free to experiment with your Dried Flower Filled Globe Ornament! Consider choosing different colors or types of flowers based on the seasons. For instance, you might use vivid autumn leaves in the fall and soft pastels in the spring. Additionally, varying the size of your globes or the ribbon colors can create a more personalized effect. You might even want to try incorporating small decorations like glitter or dried herbs for a unique twist.
Displaying or Keeping Your Project
Once your ornament is complete, think about where it will be displayed. A branch hung in front of a window can create stunning light play as the sun filters through. If you’re gifting it, consider packaging it in a way that highlights your work. Ensure it’s handled with care during transport to maintain its integrity.
FAQs About Dried Flower Filled Globe Ornament
What types of flowers work best for this project?
It’s best to use smaller, fully dried flowers or petals that won’t overwhelm the ornament’s size. Look for varieties that maintain their color and structure over time.
How do I remove moisture from flowers?
Make sure the flowers are completely dry before starting. If you notice any moisture, leave them to dry in a warm, dry place before using them in your ornament.
Can I incorporate a liquid into the globe?
No, it’s important to keep the globe dry to maintain the integrity of the dried flowers. Adding liquids can lead to deterioration and spoilage.
What if my flowers crowd the space?
If the arrangement feels too crowded, you can always adjust by removing a few blooms. Aim to leave space so that each flower can be appreciated.
How can I ensure my ornament lasts?
Store it in a cool, dry location out of direct sunlight to maintain the colors and integrity of the flowers for longer.
A Final Helpful Note
As you embark on this floral crafting adventure, remember that the Dried Flower Filled Globe Ornament is not just about the final product. It’s a creative process that invites you to slow down and enjoy. Allow yourself to have fun with the materials, experiment, and express your unique style. Your finished ornament will reflect your creativity and the memories behind the flowers.
Conclusion
Creating a Dried Flower Filled Globe Ornament gives you the chance to showcase the beauty of nature in your home or share a heartfelt gift with someone special. If you're searching for more floral inspiration, you might find joy in learning about
pressed floral glass ornamentsor exploring unique options on
Etsy for dried flower ornament balls. Embrace the crafting journey, and soon you will have enchanting decorations or cherished gifts to brighten your space!
Follow us on social for more floral DIY projects & botanical inspiration!
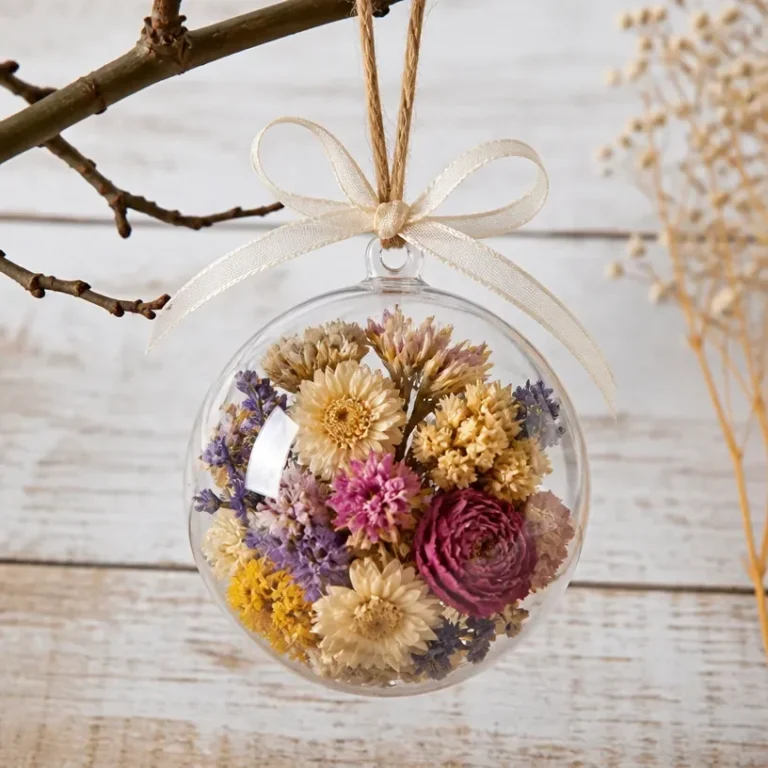
Dried Flower Filled Globe Ornament
Would you like to save this recipe?
By submitting you agree to receive this recipe and occasional emails. Unsubscribe anytime.
Ingredients
Materials
- 1 piece clear plastic fillable globe (3 inches) The foundation of your ornament that holds everything together.
- 12 pieces fully dried small petals or flower heads Choose flowers that hold significance or beauty to you.
- 12 inches thin twine Perfect for hanging your creation securely.
- 8 inches ribbon For a lovely bow that adds an extra touch of charm.
- 1 piece manufacturer’s closure Keeps your floral treasure snug within the globe.
Instructions
Preparation
- Open the globe according to its closure design and inspect it for cracks. Keeping the empty halves or cap on a towel will prevent scratches.
- Choose fully dry flowers small enough to fit through the opening without crushing. Remove loose stems and any pieces that retain moisture to ensure they last.
- Place the botanicals loosely inside using tweezers, filling no more than about one-third of the space.
Assembly
- Close the globe using its original fastener and check that it stays securely shut when held upright.
- Tie twine through the built-in loop, then add a ribbon bow to the loop for a decorative finish.
- Hang from a branch that can support the ornament. Remember to keep it away from direct sunlight and heating vents.
Last Step: Don’t forget to leave a rating and comment below! It helps other readers find the best recipes — and it helps us too!
Tips & Notes:
Nutrition Information: Serving: 1 | Calories: | Carbohydrates: | Protein: | Fat: | Sodium: | Fiber: | Sugar:
Nutritional information is provided as a courtesy and calculated automatically. Values can vary depending on the brands and ingredients you use, so if you’re tracking closely, I recommend calculating with your own preferred tool.