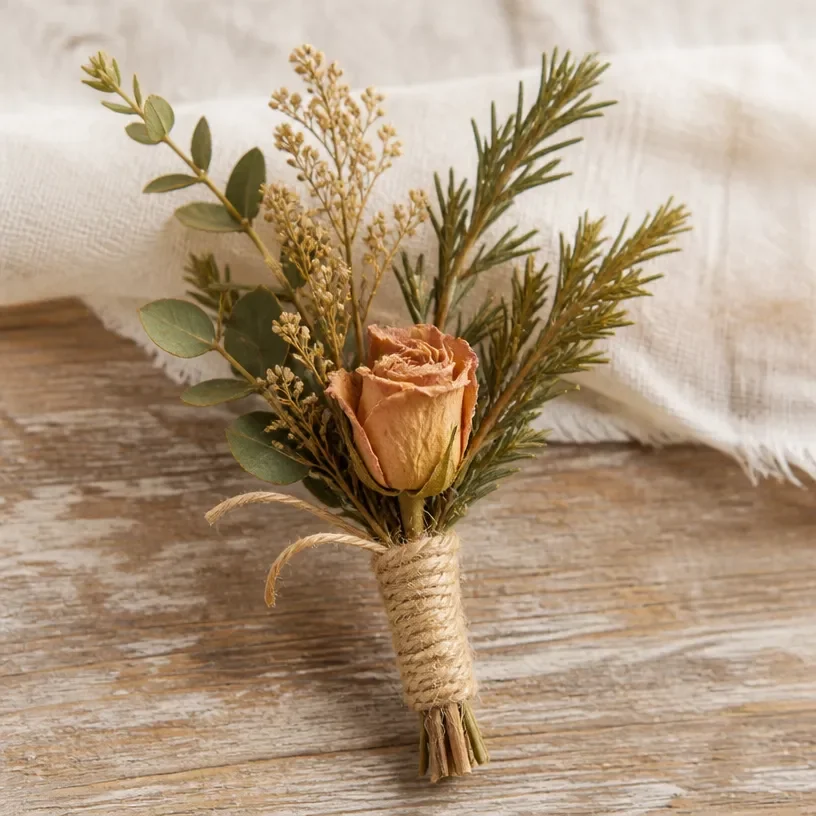
Creating floral crafts can be a delightful way to express creativity and preserve meaningful moments. Whether you’re sifting through flowers that hold special memories or hoping to transform dried botanicals into stunning displays, crafting is always rewarding. This is where the charm of a Dried Flower Boutonniere comes in a simple yet elegant way to incorporate nature into your everyday life. The blend of colors, textures, and the nostalgia attached to dried flowers makes this project not just enjoyable but also a lovely personal experience in floral design. You may also find Dried Flower Filled Globe Ornament useful.
Why This Dried Flower Boutonniere Works So Well
You may also find Dried Flower Lantern Diy Tutorial Guide useful.
The appeal of a dried flower boutonniere lies in its simplicity and versatility. This project is approachable, making it perfect for both seasoned crafters and those just starting out. You’ll find satisfaction in the process of choosing your materials, arranging them, and ultimately creating a wearable piece of art. The materials are manageable, and with a bit of creativity, you can customize your boutonniere to suit various occasions. This means you can incorporate colors and textures that resonate with a specific event or personal style. You may also find Dried Flower Shadow Box Paper Butterfly useful.
A Quick Look Before You Begin
Creating your dried flower boutonniere will involve a few straightforward steps. You’ll set up your workspace, gather your materials, and prepare the flowers for arrangement. As with any craft, it’s helpful to visualize how your finished piece will look. You can expect a relaxed mess level since you’ll be handling flowers that are already dried and ready for assembly. This stage will require gently arranging your floral elements, keeping in mind how they will fit together before securing them in place.
Materials You’ll Need
- Dried flowers: These will serve as the focal point of your boutonniere. Consider florals with varying colors and shapes for added interest.
- Floral wire: This helps to securely attach the flowers and create a sturdy structure.
- Tape or ribbon: Adds a decorative touch while also helping to bind the stems.
- Scissors: For cutting stems and trimming elements to the desired length.
- Hot glue gun: Useful for securing delicate parts that might not hold on their own.
Selecting the right flowers is key to achieving the look you desire. You might want to opt for florals that contrast nicely with each other in terms of both color and texture, adding depth to your arrangement.
Step-by-Step Directions
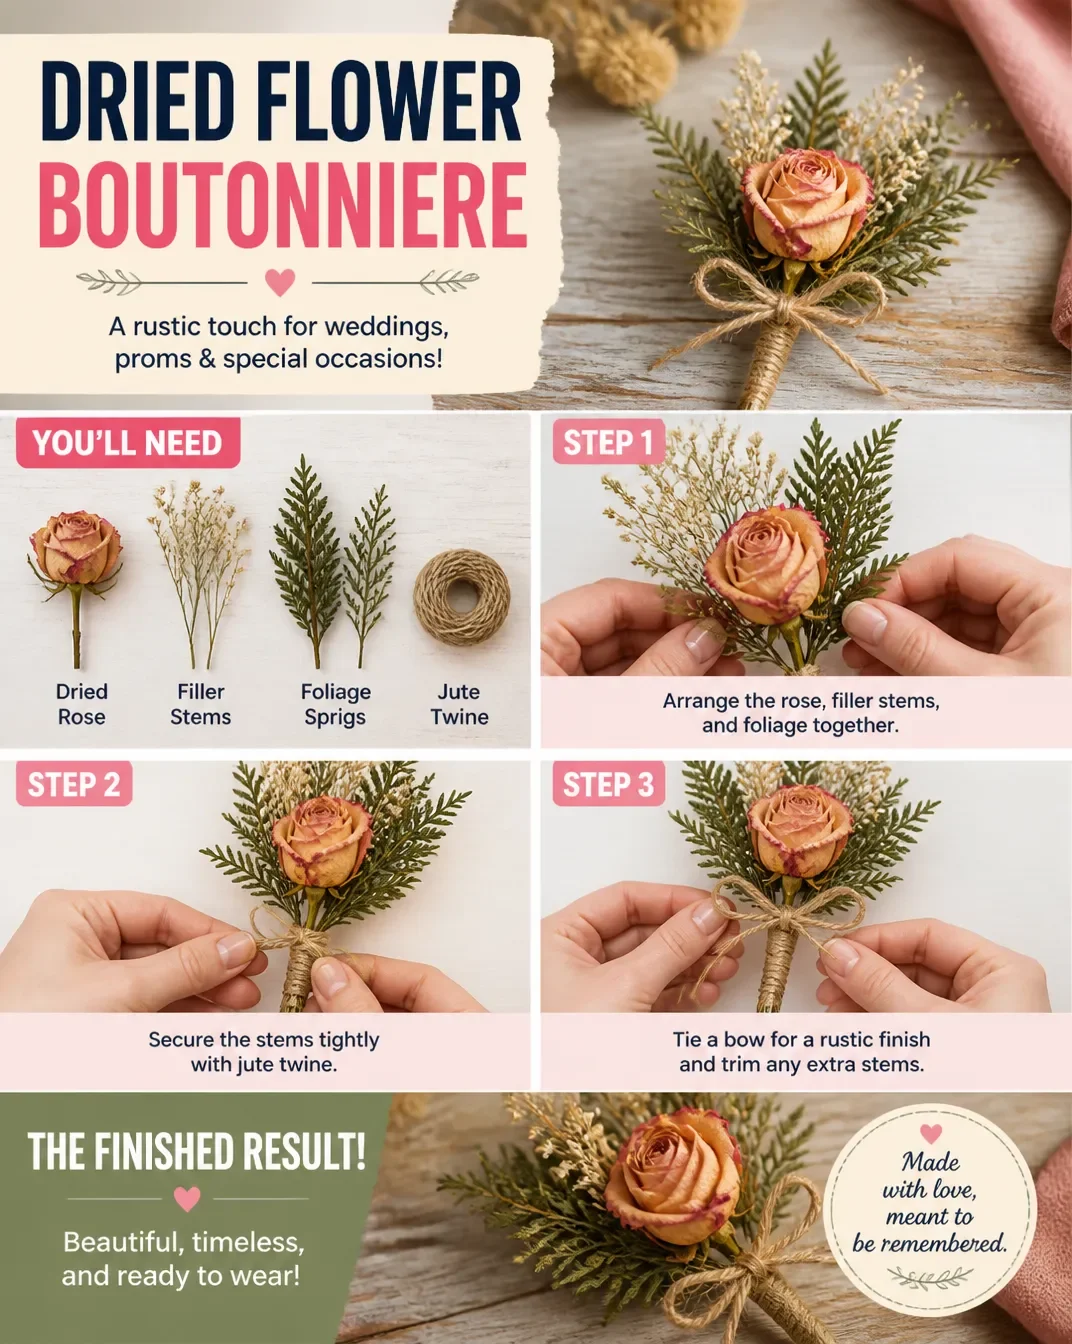
Prepare Your Workspace: Clear your workspace and lay out all the materials you’ll need. A clean area allows for a smoother crafting experience.
Choose Your Flowers: Select a variety of dried flowers that appeal to you. Think about mixing taller stems with shorter ones for a layered effect.
Cut Stems: Using scissors, trim the stems to your desired length while considering how the boutonniere will sit when worn.
Arrange Flowers: Hold the chosen flowers together to experiment with their arrangement. Aim for a balanced look by spacing them well. Ensure the most visually prominent pieces are in the center.
Secure the Arrangement: Once you’re happy with the arrangement, use floral wire to bind the flowers tightly, starting from the base of the stems and moving upward.
Wrap with Tape or Ribbon: To finish off the boutonniere, wrap the base with tape or ribbon, creating a clean and polished look. Make sure to leave enough ribbon to create a tie if desired.
Final Adjustments: Step back and assess your work. Slightly adjust flower positions to enhance visual balance if needed.
Creating your boutonniere can be as flexible as you wish. The beauty lies in personal touches and choices, as you bring your vision to life.
The Design Behind This Floral DIY
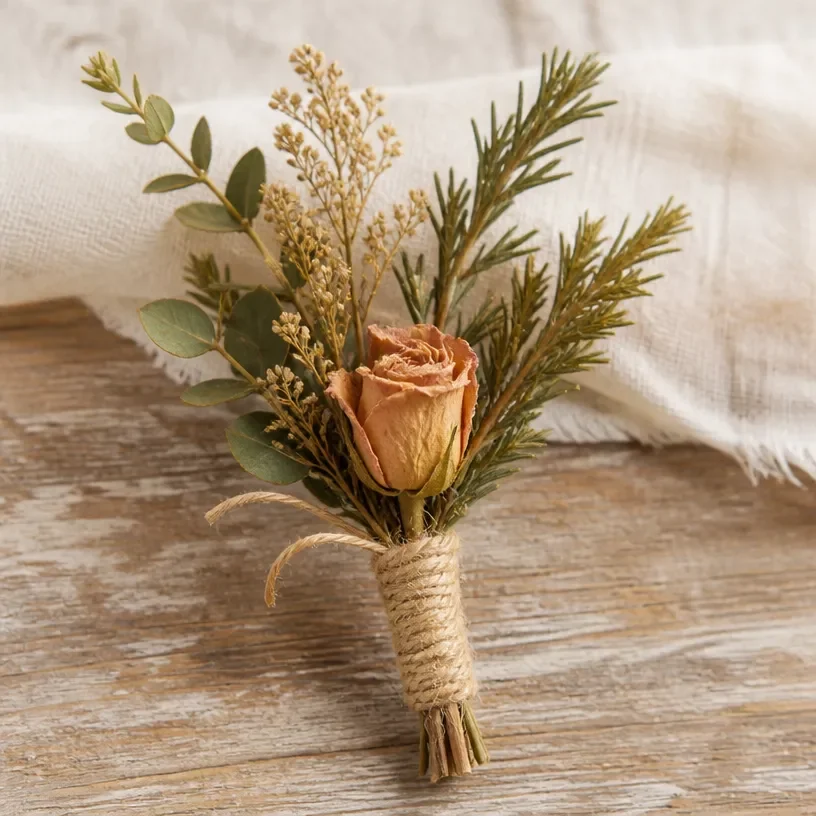
The floral design of your boutonniere will be influenced by various elements. Consider the balance between your flowers, ensuring that no single bloom overshadows another. Mixing different textures can also add interest smooth petals alongside brittle leaves create an engaging visual. When choosing your colors, think about complementary hues that can elevate your overall look, while layering flowers helps create a sense of depth.
Spacing is equally essential, both for aesthetics and structural integrity. Ensure that flowers are not crammed too closely together, allowing the unique features of each bloom to shine through. A well-placed focal flower surrounded by smaller blooms often leads to a captivating and harmonious design.
Troubleshooting Common Issues
Common challenges can arise when making a boutonniere, but they are often easily remedied. If the flowers shift too much during assembly, consider securing them with additional floral wire. Uneven placement of the flowers can happen; simply step back to assess the arrangement and gently reposition them as needed. If visible adhesive becomes an issue, dab carefully with a glue gun to minimize its appearance without sacrificing hold.
Sometimes, you might find that your finished arrangement looks too crowded or sparse. If your boutonniere feels overcrowded, feel free to remove a few flowers or reassign their positions. Conversely, if it seems bare, look for smaller filler elements like dried grasses or smaller dried florals to enhance fullness.
Easy Variations to Try
- Color Theme: Use colors that match the season or event you’re dressing for.
- Mix Botanicals: Combine dried flowers with natural elements such as twigs or pinecones for added texture.
- Unique Background: Experiment with backgrounds like fabric or paper behind your boutonniere to showcase it effectively during display.
- Larger Size: Consider scaling your boutonniere for larger events, such as weddings, where it could serve as a statement piece.
- Gift Presentation: Package your creation in a beautiful box or with a personalized note to elevate your gift giving.
These ideas provide a springboard to customizing your craft further, ensuring that your dried flower boutonniere remains unique and personal.
Displaying or Keeping Your Project
Once you’ve created your boutonniere, think about how to display or store it properly. If it’s for a special occasion, wear it with pride! Afterward, consider framing it in a shadow box to preserve its beauty as décor. You can also set it aside in a dry, dark place to prevent fading if you wish to keep it intact as a memento.
Handling the boutonniere carefully will help maintain its appearance, especially if it’s made with delicate flowers or configurations. If you have leftover materials, see if you can develop them into another project, reducing waste and enhancing your crafting experience.
FAQs About Dried Flower Boutonniere
What types of dried flowers work best for a boutonniere?
Choose flowers that can retain their shape and color after drying. Options like lavender, baby’s breath, and strawflowers are popular choices.
Can I use fresh flowers instead?
While the focus here is on dried flowers, you can use fresh ones for special occasions. However, keep in mind they won’t have the same longevity.
Do I need any special tools?
Basic tools like scissors and a hot glue gun will suffice. If you have floral tape and wire, it will make securing the arrangement easier.
What if my flowers appear too fragile?
Carefully handle delicate petals and consider reinforcing them with more sturdy materials like ribbon or tape for construction.
How can I customize my boutonniere?
Try mixing different types of dried flowers and greenery. You can also experiment with the size and color palette based on your personal preference or occasion.
A Final Helpful Note
Creating a dried flower boutonniere combines creativity with a personal touch. Allow yourself to play with materials, experiment with arrangements, and enjoy the process. Remember, each craft is a unique expression of your style and dedication to preserving beautiful moments. Craft with confidence, knowing that there’s no right or wrong way to enjoy your floral endeavors.
Conclusion
Incorporating dried flowers into your craft projects can be a rewarding experience. If you're interested in further exploring this beautiful trend, consider browsing options such as
Dried Boutonniere – Amazon.com, or check out a variety of styles at
Boutonnieres – Dried Flowers Forever. Each piece you create tells a story, so embrace the journey of crafting and enjoy the beauty of nature right at your fingertips.
Follow us on social for more floral DIY projects & botanical inspiration!

Dried Flower Boutonniere
Would you like to save this recipe?
By submitting you agree to receive this recipe and occasional emails. Unsubscribe anytime.
Ingredients
Materials
- Variety pieces Dried flowers Choose florals with varying colors and shapes for added interest.
- 1 roll Floral wire Helps to securely attach the flowers.
- 1 roll Tape or ribbon Adds a decorative touch while binding the stems.
- 1 piece Scissors For cutting stems and trimming elements.
- 1 piece Hot glue gun Useful for securing delicate parts.
Instructions
Preparation
- Prepare your workspace by clearing a clean area and laying out all materials.
- Select a variety of dried flowers for your boutonniere, mixing taller and shorter stems.
- Using scissors, trim the stems to the desired length.
Assembly
- Experiment with the arrangement of flowers for a balanced look.
- Secure the arrangement using floral wire, starting at the base of the stems.
- Wrap the base with tape or ribbon to create a clean finish.
- Make final adjustments to flower positions for enhanced visual balance.
Last Step: Don’t forget to leave a rating and comment below! It helps other readers find the best recipes — and it helps us too!
Tips & Notes:
Nutrition Information: Serving: 1 | Calories: | Carbohydrates: | Protein: | Fat: | Sodium: | Fiber: | Sugar:
Nutritional information is provided as a courtesy and calculated automatically. Values can vary depending on the brands and ingredients you use, so if you’re tracking closely, I recommend calculating with your own preferred tool.