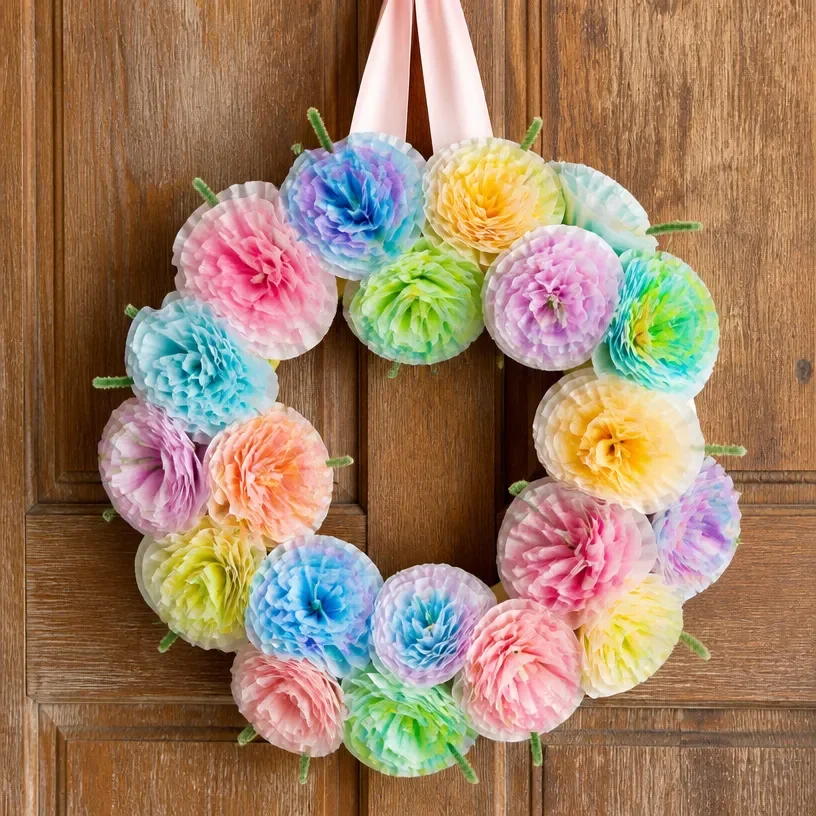
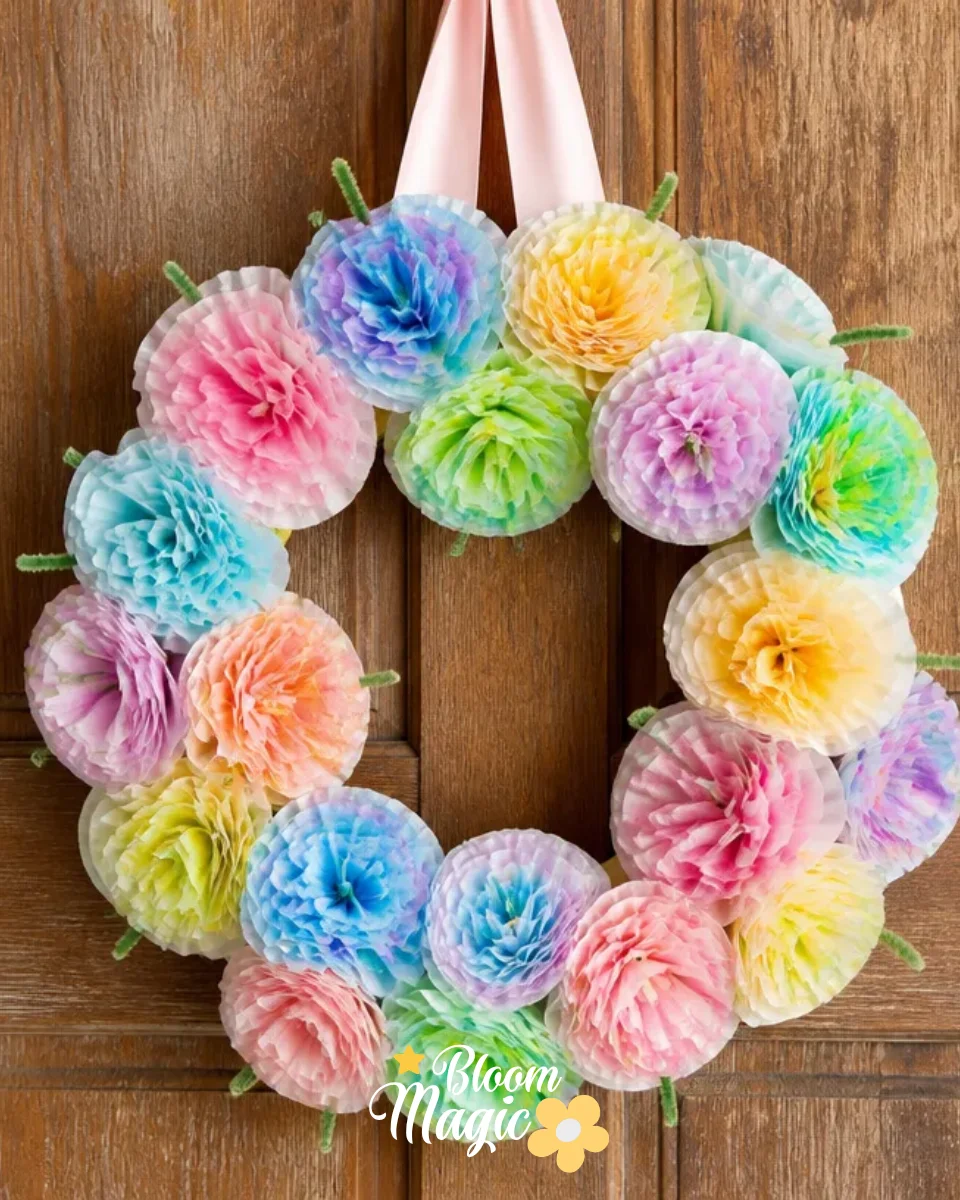
Creating crafts that combine creativity with the beauty of nature is always satisfying. Recently, I found myself with a collection of coffee filters and was inspired to turn them into a stunning Coffee Filter Flower Wreath. This project not only allows you to explore your artistic side but also serves as a unique decorative piece for your home. You may also find Coffee Filter Tie Dye Flower Bouquet useful.
Why This Coffee Filter Flower Wreath Works So Well
You may also find 3D Flower Wall Art Ideas Home Decor useful.
The Coffee Filter Flower Wreath is an ideal project for crafters at any skill level. Its approachable nature makes it perfect for decorating your space or creating a memorable gift. With simple materials and straightforward steps, you’ll find this craft rewarding both visually and in the act of creation. Working with coffee filters allows for a variety of colors and textures, while the lightness of the flowers adds a sense of delicacy. This project highlights the beauty of flowers while remaining manageable and enjoyable. You may also find Clear Glue Pressed Flower Suncatcher useful.
A Quick Look Before You Begin
The process of making a Coffee Filter Flower Wreath is straightforward and fun. Start by gathering all your materials, setting up a clean workspace, and mentally prepping for a creative session. You’ll enjoy the hands-on aspect of this floral DIY as you transform basic coffee filters into delightful flower blooms. I encourage you to embrace the process it’s about creating something beautiful while exploring your creative instincts.
Materials You’ll Need
- Coffee filters: These form the base of your flowers. You can dye them for added color.
- Green floral wire: This will help in constructing the wreath structure.
- Hot glue gun and glue sticks: Use this for attaching the flowers to the base securely.
- Scissors: You’ll need these for shaping the flowers and cutting the wire.
- Optional: Floral paint or dye: For a colorful twist, consider painting your filters.
Ensure you have all these materials on hand for a smoother crafting experience.
Step-by-Step Directions
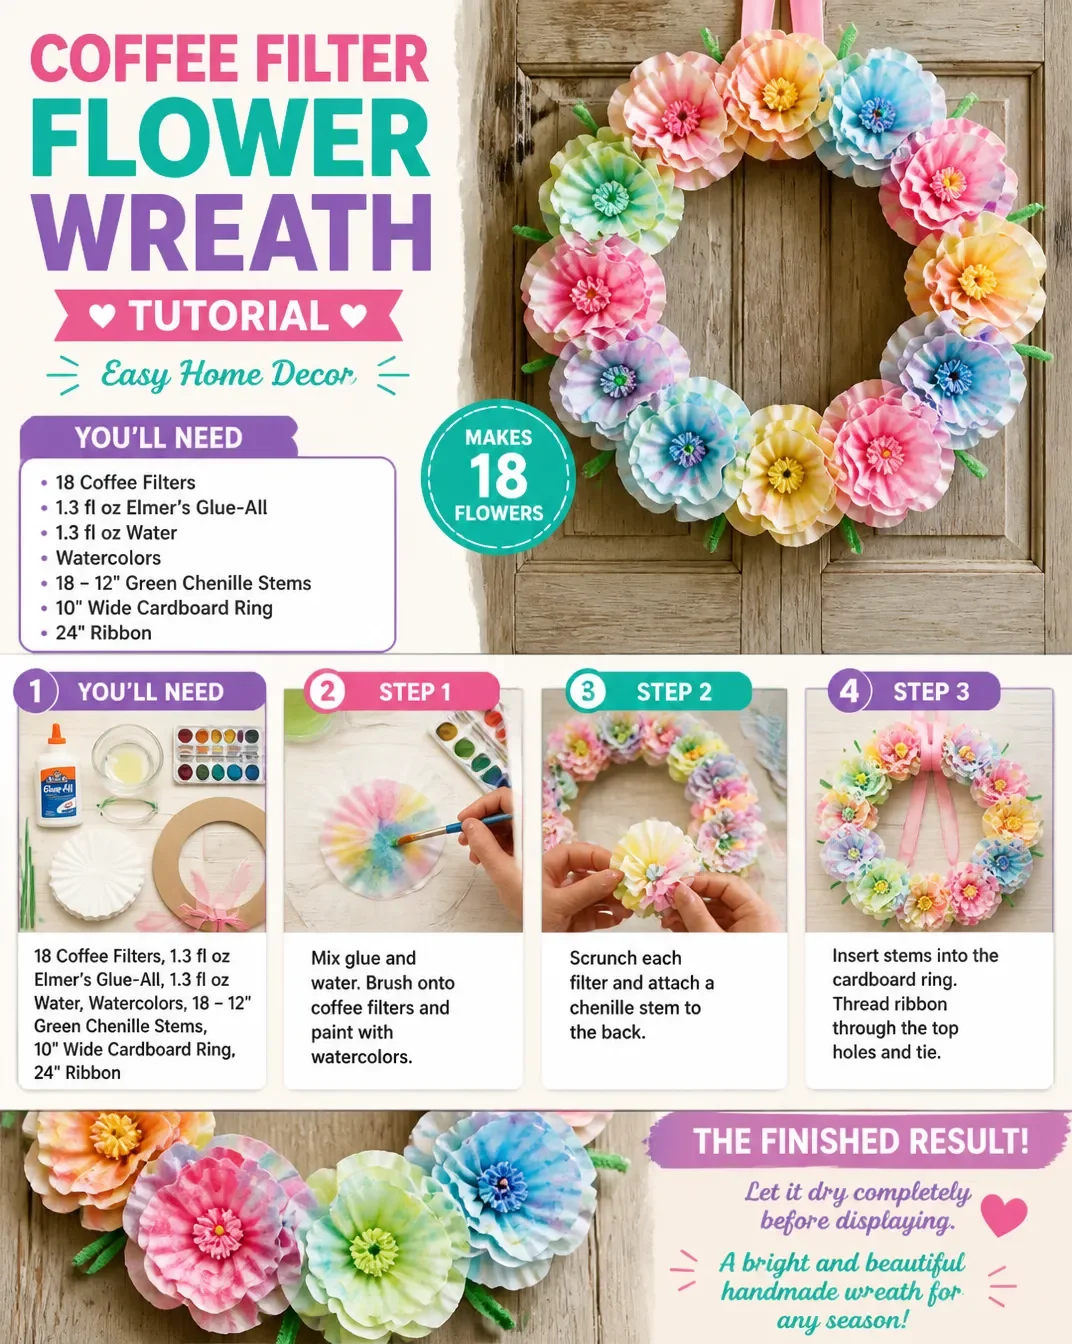
- Begin by dyeing the coffee filters if you wish to add color. Mix food coloring with water in a spray bottle and lightly mist the filters, letting them dry completely.
- While the filters dry, cut lengths of green floral wire to create the base of your wreath. Form the wire into a circular shape that matches your design.
- Once your coffee filters are dry, stack a few filters at a time and pinch them together to form clusters. This will create the flower shapes you’ll be attaching.
- Use the hot glue gun to attach the clusters of filters to the green wire base. Start from the outer edge and work your way inward, ensuring you fill in the gaps as you go.
- Continue layering until the wreath is densely packed with flowers. Feel free to mix and match colored filters to create dynamic floral arrangements.
- Once you’ve achieved your desired look, let the glue dry completely before displaying your wreath.
The Design Behind This Floral DIY
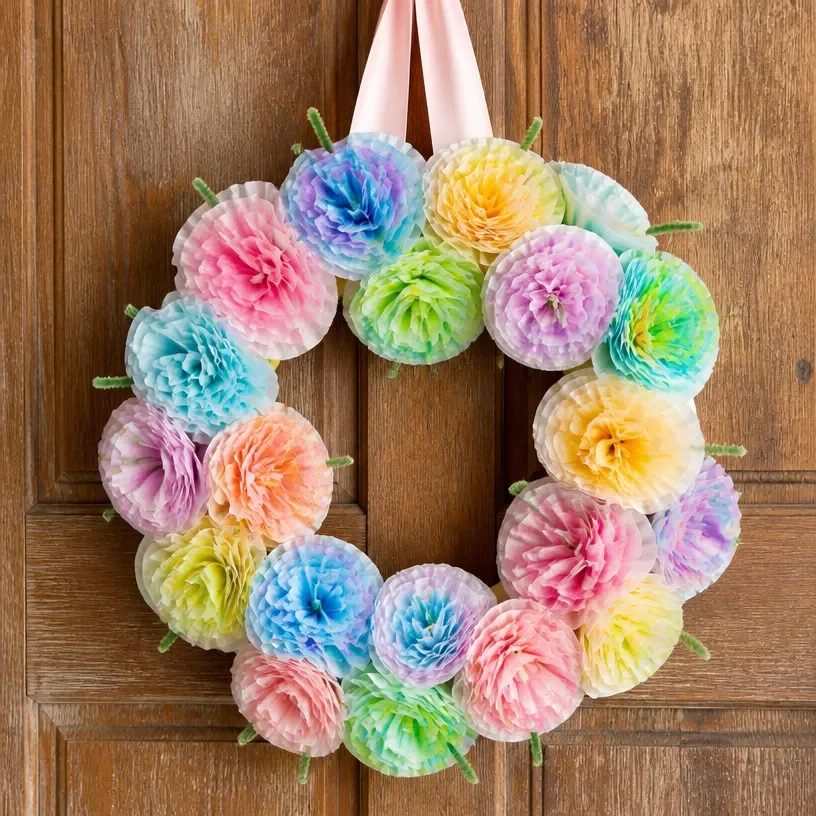
In creating your Coffee Filter Flower Wreath, consider the relationships between flower colors, shapes, and spacing. It’s essential to think about how colors can complement each other, enhancing the visual appeal. For instance, pairing pastels with bright hues can create an eye-catching contrast. You may want to cluster similar colors together or create an ombre effect. Pay attention to texture as well; using crinkled paper can add depth, while smooth surfaces offer a clean look. Balancing your design with a variety of flower sizes will make the wreath look more natural and engaging.
Troubleshooting Common Issues
Sometimes, projects don’t go as planned. If you find your flowers looking uneven or shifted during assembly, don’t fret. This can often be fixed by gently repositioning the filters while the glue is still warm and pliable. If you’re dealing with too much visible glue, be mindful of applying small amounts at a time. Furthermore, if the arrangement appears too sparse, try adding more flowers in clusters rather than spreading them too thinly across the wreath.
Easy Variations to Try
Consider experimenting with different styles for your Coffee Filter Flower Wreath. You could:
- Use Halloween-themed colors for a seasonal twist.
- Create small flower accents for a matching bouquet or table setting.
- Change the background from green floral wire to a wooden or metal frame for a rustic look.
- Use fabric scraps for leaf accents to give your wreath a mixed-media appearance.
Each variation creates a distinct charm, making your wreath uniquely yours.
Displaying or Keeping Your Project
Once completed, think about where to showcase your newly crafted wreath. You can hang it on your front door, a wall in your living room, or as a centerpiece in a dining area. To preserve the colors, avoid direct sunlight and keep it in a dry, cool location. If gifting is on your mind, wrap it up in tissue paper and place it in a decorative box to protect its beauty.
FAQs About Coffee Filter Flower Wreath
Can I use other types of paper instead of coffee filters?
Absolutely! While coffee filters are great for this project, you can experiment with tissue paper or even old book pages for a different look.
How do I store my wreath after I finish it?
Store your wreath in a cool, dry place, ideally in a box or on a shelf where it won’t get crushed.
What if I don’t have hot glue?
If hot glue isn’t available, consider using craft glue, but keep in mind it may require more drying time.
A Final Helpful Note
Feeling encouraged yet? Remember, the beauty of a Coffee Filter Flower Wreath lies in its flexibility and your personal touches. Take your time, enjoy the crafting process, and don’t hesitate to make adjustments as you go. This project is not only about the final product but also the joy of creation and the curious exploration of your artistic potential.
Conclusion
Creating a Coffee Filter Flower Wreath is an engaging way to explore your creative side while crafting a unique piece of décor. To gain additional insights and tutorials on similar floral crafts, check out
How To Make A Coffee Filter Wreath DIYand discover more ideas on how to use these vibrant materials effectively through the
Coffee Filter Flower Wreath Tutorial. Enjoy your crafting journey!
Follow us on social for more floral DIY projects & botanical inspiration!

Coffee Filter Flower Wreath
Would you like to save this recipe?
By submitting you agree to receive this recipe and occasional emails. Unsubscribe anytime.
Ingredients
Materials
- 20 pieces Coffee filters These form the base of your flowers. You can dye them for added color.
- 1 roll Green floral wire This will help in constructing the wreath structure.
- 1 piece Hot glue gun Use this for attaching the flowers to the base securely.
- 3 pieces Glue sticks For use with the hot glue gun.
- 1 piece Scissors You will need these for shaping the flowers and cutting the wire.
- 1 bottle Floral paint or dye (optional) For a colorful twist, consider painting your filters.
Instructions
Preparation
- Begin by dyeing the coffee filters if you wish to add color. Mix food coloring with water in a spray bottle and lightly mist the filters, letting them dry completely.
- While the filters dry, cut lengths of green floral wire to create the base of your wreath. Form the wire into a circular shape that matches your design.
Assembly
- Once your coffee filters are dry, stack a few filters at a time and pinch them together to form clusters. This will create the flower shapes you’ll be attaching.
- Use the hot glue gun to attach the clusters of filters to the green wire base. Start from the outer edge and work your way inward, ensuring you fill in the gaps as you go.
- Continue layering until the wreath is densely packed with flowers. Feel free to mix and match colored filters to create dynamic floral arrangements.
- Once you’ve achieved your desired look, let the glue dry completely before displaying your wreath.
Last Step: Don’t forget to leave a rating and comment below! It helps other readers find the best recipes — and it helps us too!
Tips & Notes:
Nutrition Information: Serving: 1 | Calories: | Carbohydrates: | Protein: | Fat: | Sodium: | Fiber: | Sugar:
Nutritional information is provided as a courtesy and calculated automatically. Values can vary depending on the brands and ingredients you use, so if you’re tracking closely, I recommend calculating with your own preferred tool.