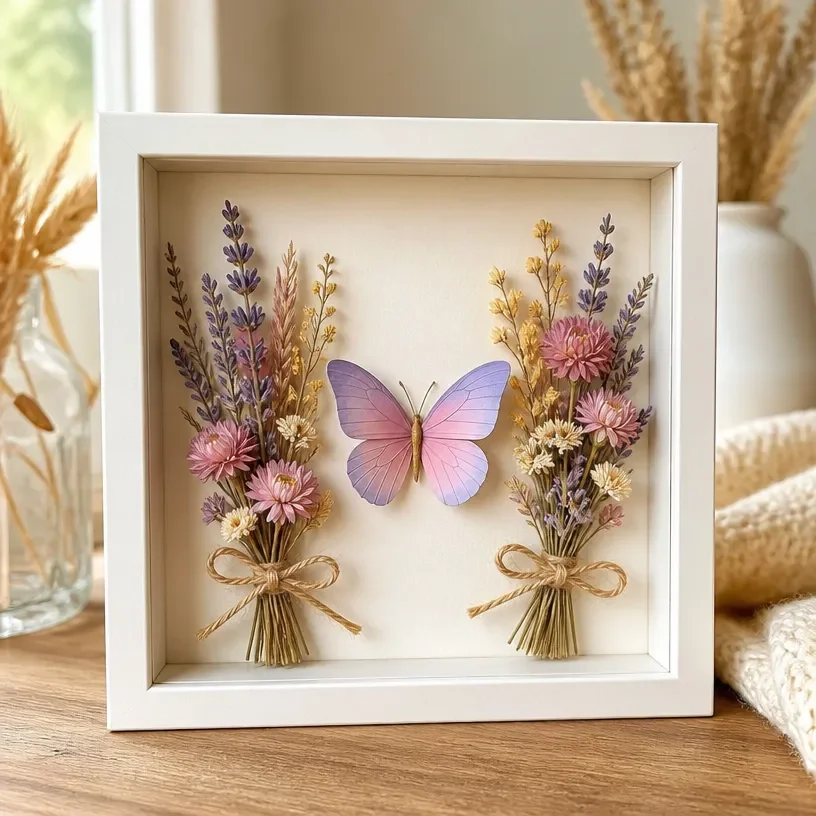
Dried flowers can hold a lot of memories, capturing the essence of a special event or a moment in time. Picture yourself surrounded by an assortment of vibrant blooms, preparing to create something that not only beautifies your space but also tells a story. If you’re looking for a way to showcase preserved flowers in a creative and eye-catching manner, the Dried Flower Shadow Box with a Paper Butterfly is an excellent project. This craft allows you to blend personal memories and creativity, resulting in a stunning decorative piece that reflects your style. You may also find Dried Flower Lantern Diy Tutorial Guide useful.
Why This Dried Flower Shadow Box with a Paper Butterfly Works So Well
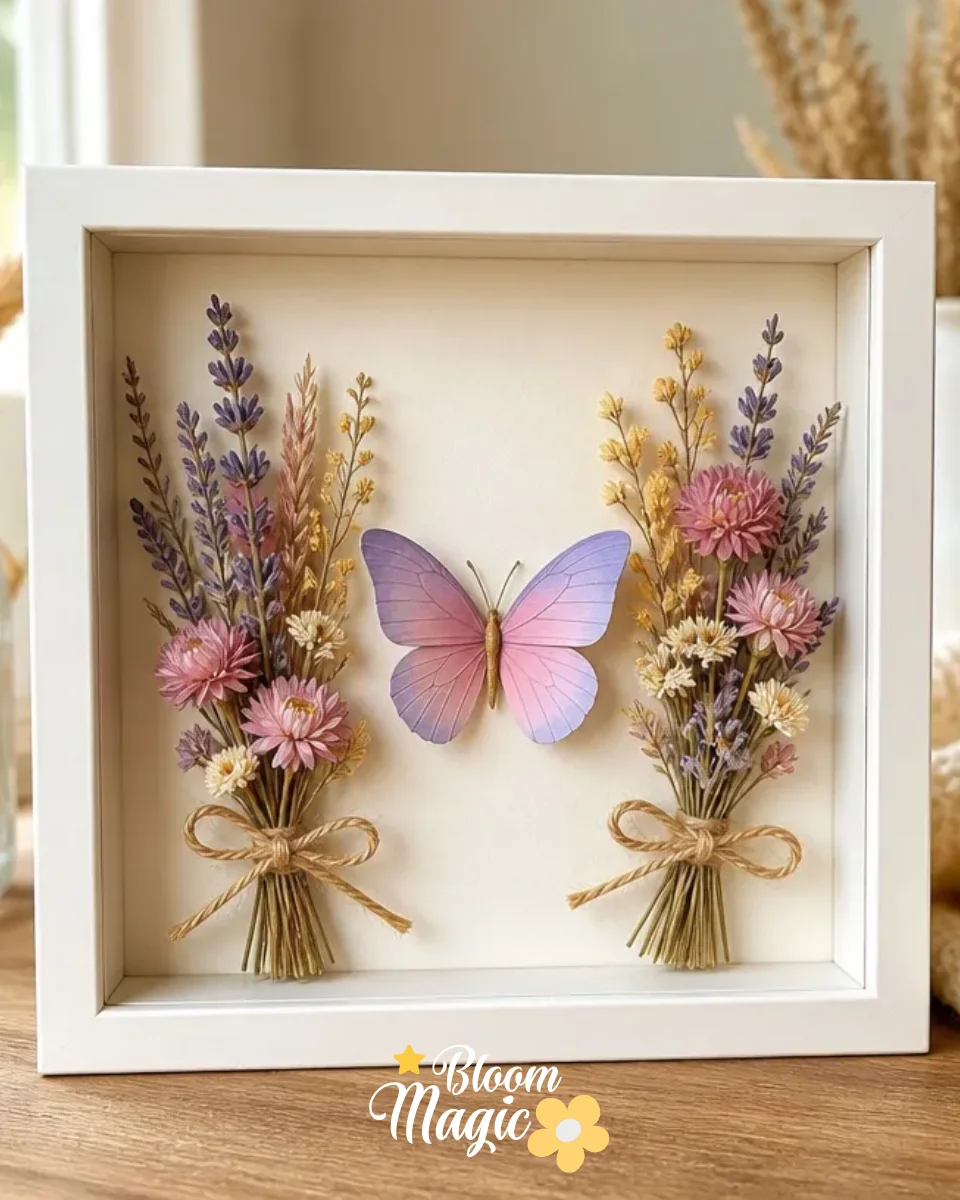
You may also find Fruit Foam Net Flower Shadow Box For Home Decor useful.
Creating a Dried Flower Shadow Box with a Paper Butterfly is more than just a simple craft; it’s an approachable way to channel your creativity. The combination of dried flowers and a delicate paper butterfly adds a unique touch, making it visually rewarding. You can easily manage this project using the provided materials, which make it a reliable option for your decorating needs. Whether you wish to display it in your own home, give it as a heartfelt gift, or enhance your home decor, this project is ready to elevate the way you showcase your botanical treasures. You may also find Fruit Foam Net Flower Shadow Box Home Decor useful.
How This Floral DIY Comes Together
The project flows seamlessly from setting up your workspace to showcasing your beautiful finished shadow box. To begin, gather your materials and create a pleasant work environment where you can channel your creativity. Focus on how the floral elements come together, taking ample time to arrange and rearrange until you achieve the desired look. It’s a balanced mix of ensuring that the arrangement remains delicate while bringing out the charm of each component. You won’t need to worry about excessive mess, which makes this project manageable and enjoyable.
Materials You’ll Need
- Shadow Box Frame: A medium-sized frame provides the perfect structure for your design.
- Dried Flowers: Assorted dried flowers in various colors and sizes to bring your design to life.
- Paper Butterfly: A decorative element that adds charm and grace.
- Floral Tape or Glue: Essential for securing your flowers and embellishments in place.
- Scissors: Handy for trimming stems or adjusting floral placements.
- Tweezers: Helpful for precise placement of smaller flowers or delicate elements.
- Backing Material: A sturdy surface behind your shadow box display that might come with the frame.
These essential items will assist you in crafting a stunning Dried Flower Shadow Box. Each element plays a significant role in achieving a harmonious and well-composed design.
Step-by-Step Directions
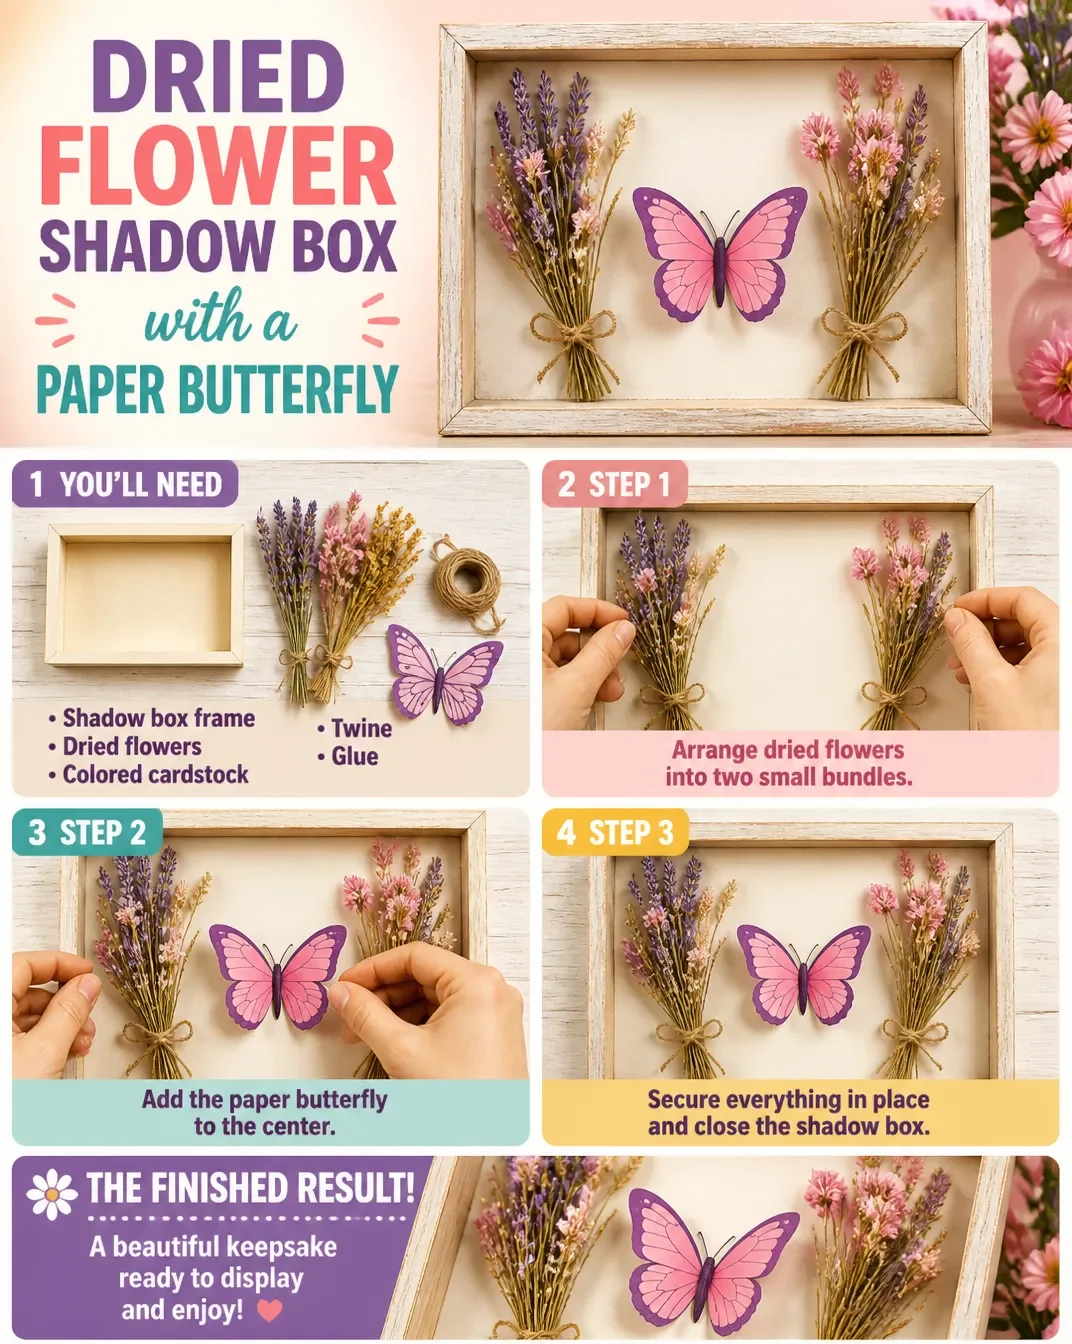
Prepare Your Workspace: Clear off a flat surface and lay down some protective material to keep your area tidy.
Select Your Flowers: Choose an assortment of dried flowers based on their color, shape, and size. Lay them out and get a sense of how they will fit within the shadow box.
Trim the Stems: Use scissors to cut the stems of the dried flowers according to your design. Keep the flower heads at a length that suits your arrangement.
Arrange the Flowers: Place your flowers within the shadow box, starting with larger blooms from the back and layering smaller ones in the front. Adjust the positioning until you are happy with the composition.
Secure the Flowers: Using floral tape or glue, carefully attach the flowers to the backing of the shadow box. Take your time to ensure they’re well-positioned.
Add the Butterfly: Gently incorporate the paper butterfly into your arrangement, choosing a spot that complements the floral display.
Final Adjustments: Step back and assess your work. Make any final tweaks to the flower placement to enhance balance and aesthetics before sealing the box.
Close the Shadow Box: Once satisfied with the arrangement, assemble your shadow box, ensuring everything is securely mounted.
Display Your Creation: Find a charming spot in your home to showcase your beautiful Dried Flower Shadow Box, or consider gifting it to someone special.
The Creative Details That Bring It Together
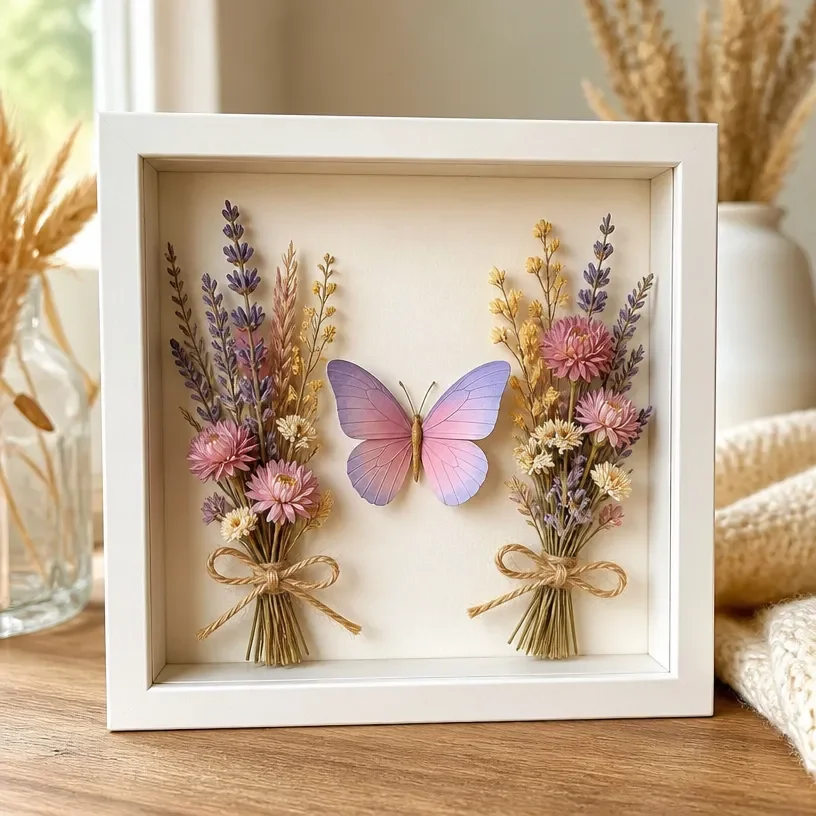
The design of a Dried Flower Shadow Box relies heavily on color relationships and the layering of various textures. When selecting flowers, take care to choose colors that complement one another, as well as varying sizes that create depth. Placement of the flowers should provide a balanced look, with visual weight distributed evenly across the box. Spacing between elements can enhance the overall composition, making sure nothing feels overcrowded while still conveying a rich arrangement.
Balancing textures is equally important. Consider incorporating smooth petals alongside textured leaves to create an interesting visual dynamic. Layering these elements thoughtfully will draw the eye and make your piece feel complete. Lastly, pay attention to the shape and arrangement: rounded clusters can evoke gentleness, while angular placements can bring energy.
Troubleshooting Common Issues
This project can sometimes present challenges, but mostly they are easily fixable. One common issue is uneven placement of flowers. If you notice that certain areas seem too sparse or crowded, reassess the arrangement. Remove flowers gently and try new placements until the design feels right. Watch for any flowers or elements that shift out of place; using sturdy adhesives can prevent this during assembly.
If your arrangement looks unbalanced, consider adjusting the colors or sizes of the flowers. Sometimes, adding a contrasting element is all it takes to complete your design. Additionally, visible adhesive can be a concern; using a fine applicator can help place glue with precision.
Easy Variations to Try
If you want to experiment with your Dried Flower Shadow Box, here are some suggestions:
- Seasonal Colors: Use flowers that reflect the current season, like vibrant autumn hues or soft pastels for spring.
- Botanical Combinations: Blend different types of dried flora, such as mixing grasses with flowers for added texture.
- Background Styles: Experiment with different backgrounds, such as painted cardboard or patterned paper, to enhance the overall display.
- Butterfly Variants: Use cutouts or embellishments in various shapes and colors for a playful twist.
These easy variations will help personalize your shadow box while maintaining the core project structure.
Displaying or Keeping Your Project
After completing your Dried Flower Shadow Box, consider how you want to display it. Hanging it on a wall can create a stunning focal point, or setting it on a shelf can offer a unique decorative element. However, ensure it’s away from direct sunlight to prevent fading and to keep the colors vibrant longer.
If you find yourself with leftover materials, consider creating additional projects for yourself or as gifts, allowing you to minimize waste while enhancing your crafting portfolio.
FAQs About Dried Flower Shadow Box with a Paper Butterfly
What flowers should I use in my shadow box?
You can select any dried flowers that appeal to you. Popular choices include lavender, roses, and eucalyptus. Just ensure they maintain their shape and color well after drying.
Can I substitute fresh flowers for dried ones?
Fresh flowers are tricky in a shadow box unless you plan to dry them first. I’ve found that dried flowers hold their shape beautifully and are easier to work with.
How can I prevent petals from becoming damaged while arranging?
Handle each flower gently, and consider using tweezers for smaller elements to avoid crushing delicate petals.
What should I do if my arrangement looks crowded?
If the design feels overcrowded, remove a flower or two, and reassess the spacing. A balanced arrangement is more visually appealing.
Can I leave my shadow box in direct sunlight?
To maintain the vibrancy of your flowers, it’s best to keep your shadow box out of direct sunlight, as exposure can lead to fading over time.
A Final Helpful Note
As you embark on your journey to create the Dried Flower Shadow Box with a Paper Butterfly, allow yourself to enjoy the process. Each step is an opportunity for self-expression, and there are no strict rules that dictate your creativity. Be flexible, experiment with your materials, and most importantly, have fun crafting. This project invites you to blend your love for flowers with artistic flair, resulting in something truly unique to you.
Conclusion
To enhance your crafting experience further, explore ready-made options at places like
Flower Shadow Box – Etsyfor inspiration or supplies. If you’re interested in crafting skills, consider attending a workshop, such as the
Butterfly Shadowbox Workshop – Daniel Stowe Conservancy, to hone your techniques. With confidence and practice, your floral creations can evolve beautifully!
Follow us on social for more floral DIY projects & botanical inspiration!

Dried Flower Shadow Box
Would you like to save this recipe?
By submitting you agree to receive this recipe and occasional emails. Unsubscribe anytime.
Ingredients
Materials
- 1 medium-sized frame Shadow Box Frame Provides the perfect structure for your design.
- assorted bunch Dried Flowers Various colors and sizes to bring your design to life.
- 1 piece Paper Butterfly Decorative element that adds charm and grace.
- 1 roll Floral Tape or Glue Essential for securing your flowers and embellishments in place.
- 1 pair Scissors Handy for trimming stems or adjusting floral placements.
- 1 piece Tweezers Helpful for precise placement of smaller flowers or delicate elements.
- 1 piece Backing Material A sturdy surface behind your shadow box display.
Instructions
Preparation
- Prepare Your Workspace: Clear off a flat surface and lay down some protective material to keep your area tidy.
- Select Your Flowers: Choose an assortment of dried flowers based on their color, shape, and size.
- Trim the Stems: Use scissors to cut the stems of the dried flowers according to your design.
Arrangement
- Arrange the Flowers: Place your flowers within the shadow box, starting with larger blooms from the back.
- Secure the Flowers: Using floral tape or glue, carefully attach the flowers to the backing of the shadow box.
- Add the Butterfly: Gently incorporate the paper butterfly into your arrangement.
- Final Adjustments: Make any final tweaks to the flower placement to enhance balance and aesthetics.
Completion
- Close the Shadow Box: Once satisfied with the arrangement, assemble your shadow box.
- Display Your Creation: Find a charming spot in your home to showcase your beautiful Dried Flower Shadow Box.
Last Step: Don’t forget to leave a rating and comment below! It helps other readers find the best recipes — and it helps us too!
Tips & Notes:
Nutrition Information: Serving: 1 | Calories: | Carbohydrates: | Protein: | Fat: | Sodium: | Fiber: | Sugar:
Nutritional information is provided as a courtesy and calculated automatically. Values can vary depending on the brands and ingredients you use, so if you’re tracking closely, I recommend calculating with your own preferred tool.