
Creating a decoupaged floral wooden serving tray is a delightful way to bring a touch of nature into your home. Imagine an afternoon spent arranging beautiful pressed flowers, with colorful blooms and delicate leaves. The aroma of the flowers lingers in the air, while your workspace transforms into a creative oasis. This project not only preserves the essence of blooms but also gives you a beautiful piece of functional art to display. The Decoupaged Floral Wooden Serving Tray is perfect for serving snacks at a gathering or as a decorative centerpiece on your table. You may also find Pressed Flower Bookplates Tutorial Floral Home Decor useful.
Why This Decoupaged Floral Wooden Serving Tray Works So Well
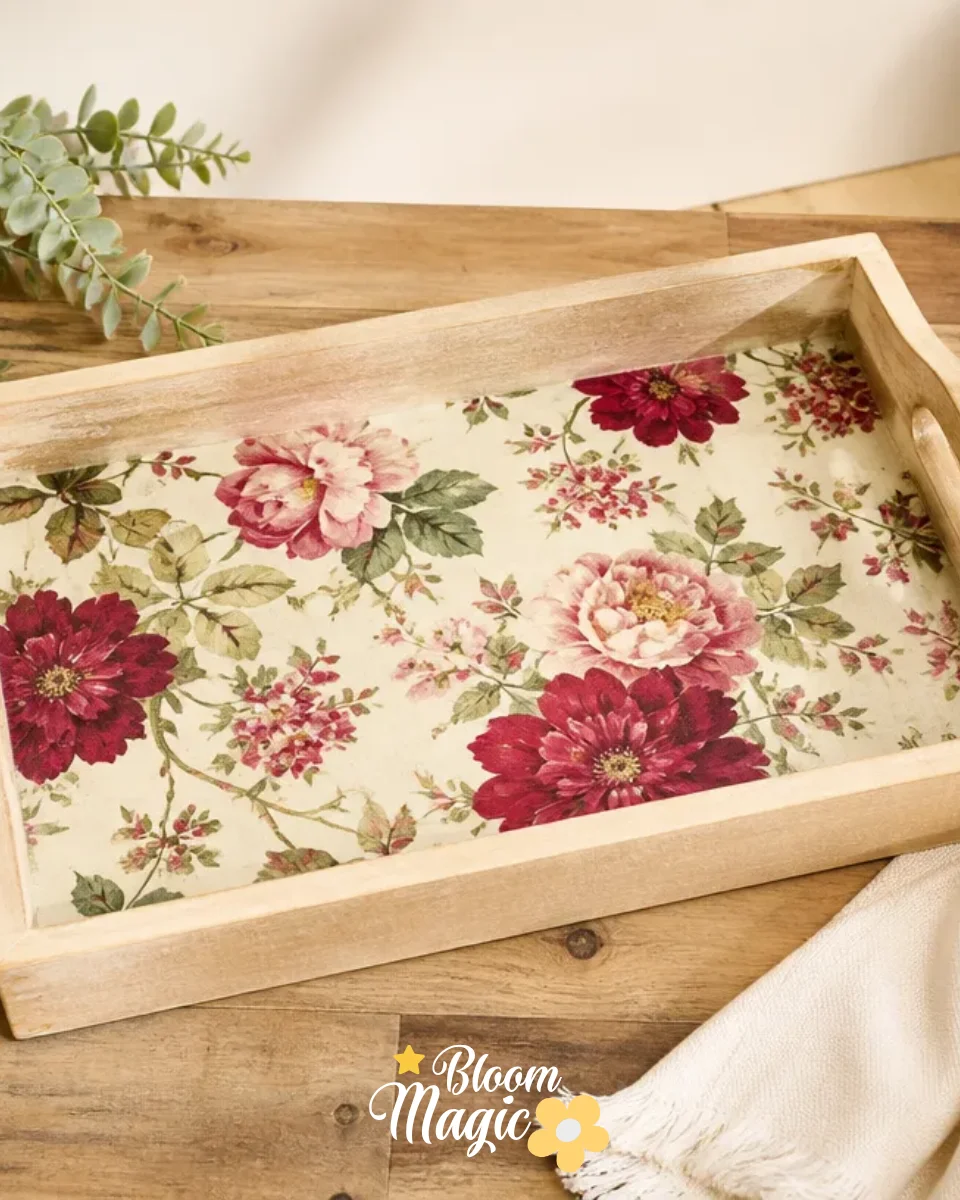
Creating this serving tray is both approachable and visually rewarding. With simple materials and clear steps, you can create something that enhances your home. The process involves working with floral elements that offer a connection to nature, and the outcome can be a standout piece in any room. It’s an excellent way to personalize your space while honing your crafting skills. Plus, it can serve as a thoughtful gift that conveys care and creativity.
A Quick Look Before You Begin
Before diving into the details, let’s take a moment to assure you of the beauty that will unfold during this project. You’ll set up your workspace, arrange your pressed flowers, and bring them together artistically with decoupage techniques. This project offers a moderate level of mess, but with preparation, you’ll find it easy to manage. Expect to make deliberate choices about flower placement and design before securing everything in place for good.
Materials You’ll Need
- Wooden serving tray: This provides a sturdy base and contributes to the overall aesthetic.
- Pressed flowers or leaves: Choose a variety that appeals to you; they add natural beauty and uniqueness.
- Decoupage medium: This will adhere your floral elements to the tray and provide a smooth, protective finish.
- Paintbrush: Use a quality brush for smooth application of the decoupage medium.
- Scissors: Sharp scissors help create precise shapes for your flowers.
- Wax paper or parchment paper: This can protect surfaces during drying and crafting.
- Optional: Clear sealant, if you wish to protect the tray further once finished.
With these supplies, you’re well-equipped to begin your floral crafting journey.
Step-by-Step Directions

- Prepare Your Workspace: Lay down wax paper to protect your surfaces. Gather all your materials.
- Arrange Flowers: Before gluing, play around with the placement of pressed flowers on the tray. Step back to see how they look together.
- Apply Decoupage Medium: Using your paintbrush, coat the area of the tray where you want to place the flowers with decoupage medium.
- Position the Flowers: Carefully place your pressed flowers onto the medium, gently pressing down to secure.
- Seal the Flowers: Once positioned, brush another layer of decoupage medium over the flowers, ensuring they’re coated well.
- Dry Thoroughly: Allow the tray to dry completely. This could take several hours or overnight for best results.
- Optional Sealing: If desired, apply a clear sealant after the decoupage has dried to further protect the artwork.
- Final Touches: Inspect your tray; make adjustments if needed, and enjoy your beautifully crafted serving tray.
This step-by-step breakdown simplifies the process, making it accessible to those new to crafting.
The Design Behind This Floral DIY

The beauty of your decoupaged tray lies in the thoughtful arrangement of flowers and leaves. Start by considering the colors you want to showcase; vibrant blooms against a neutral wooden background can create a striking contrast. Pay attention to texture, as combining smooth petals with the rough surface of wood adds visual interest. Space your flowers evenly to maintain balance while allowing for some overlap to create a layered effect. The final arrangement should draw the eye while keeping a natural, organic feel.
Troubleshooting Common Issues
Every crafter may face some issues during their project. Perhaps you find that your flowers shift after applying adhesive. A gentle touch and a light hand can prevent this; use small amounts of decoupage medium and allow for adjustments as you work. If your tray seems too crowded, step back and rearrange some elements for better spacing. It’s perfectly fine to reassess your design before sealing everything in place. A little patience goes a long way in ensuring a smooth, finished product.
Easy Variations to Try
You might want to infuse your personality into your serving tray. Here are a few variations to consider:
- Use flowers from different seasons for unique color palettes.
- Experiment with different sizes of trays, making smaller ones for coasters or larger versions for serving platters.
- Incorporate a monochromatic theme with various shades of one color for a cohesive look.
- Add botanical elements other than flowers, like interesting leaves or dried fruit slices, for added texture.
These tweaks allow you to make the design uniquely yours while keeping the foundational project intact.
Displaying or Keeping Your Project
Once completed, think about how to best enjoy your decoupaged serving tray. It can be a functional centerpiece on your dining table or a beautiful display piece on your coffee table. When not in use, store it in a safe place, avoiding areas that are damp or excessively sunny to prolong its beauty. Consider gifting it to a loved one to share your crafting joy or simply display it proudly in your home.
FAQs About Decoupaged Floral Wooden Serving Tray
What if I don’t have pressed flowers?
You can substitute with dried herbs or even use paper flowers for a different effect. Aim for materials that will adhere well and maintain durability.
Is it okay if some flowers overlap?
Yes, overlapping can create a beautiful layered look, adding depth to your project. Just ensure that the adhesive is applied carefully to avoid any damage during handling.
How do I clean my tray after it’s finished?
Simply wipe your tray with a damp cloth. Avoid harsh chemicals that might damage the finish.
A Final Helpful Note
Bringing together flowers and crafting is not only about the final product but also about enjoying the process. Allow yourself to be creative and flexible with the arrangement. Experiment with colors and compositions, and take your time; the result will reflect your personal touch beautifully. Enjoy making your Decoupaged Floral Wooden Serving Tray and imbue it with your own floral artistry.
Conclusion
Creating a decoupaged floral wooden serving tray can be a rewarding endeavor. It’s a wonderful way to incorporate the beauty of nature into your everyday life. To explore more options for wooden trays, look at Wooden Trays Decoupage – Etsy for inspiration. You can also find other artistic trays on Decoupage Trays – eBay that might spark your creativity further. Happy crafting!
Follow us on social for more floral DIY projects & botanical inspiration!
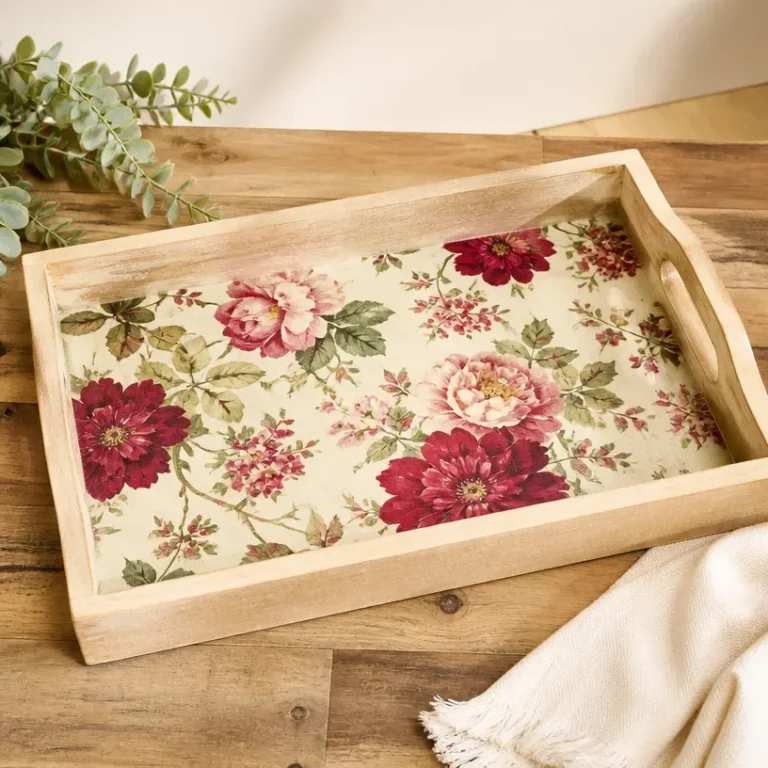
Decoupaged Floral Wooden Serving Tray
Would you like to save this recipe?
By submitting you agree to receive this recipe and occasional emails. Unsubscribe anytime.
Ingredients
Materials
- 1 pieces Wooden serving tray Provides a sturdy base.
- assorted pieces Pressed flowers or leaves Choose a variety for uniqueness.
- 1 bottle Decoupage medium Adheres flowers to the tray.
- 1 pieces Paintbrush For smooth application of medium.
- 1 pieces Scissors Sharp scissors for precise shapes.
- 1 sheet Wax paper or parchment paper Protects surfaces during drying.
- optional bottle Clear sealant Protects the tray after finishing.
Instructions
Preparation
- Lay down wax paper to protect your surfaces.
- Gather all your materials.
Flower Arrangement
- Play around with the placement of the pressed flowers on the tray.
- Step back to see how they look together.
Application
- Using your paintbrush, coat the tray area where you want to place the flowers with decoupage medium.
- Carefully place your pressed flowers onto the medium, gently pressing down to secure.
- Brush another layer of decoupage medium over the flowers to coat them well.
Drying and Sealing
- Allow the tray to dry completely, which could take several hours or overnight.
- If desired, apply a clear sealant after the decoupage has dried.
Final Touches
- Inspect your tray; make adjustments if needed.
- Enjoy your beautifully crafted serving tray!
Last Step: Don’t forget to leave a rating and comment below! It helps other readers find the best recipes — and it helps us too!
Tips & Notes:
Nutrition Information: Serving: 1 | Calories: | Carbohydrates: | Protein: | Fat: | Sodium: | Fiber: | Sugar:
Nutritional information is provided as a courtesy and calculated automatically. Values can vary depending on the brands and ingredients you use, so if you’re tracking closely, I recommend calculating with your own preferred tool.