
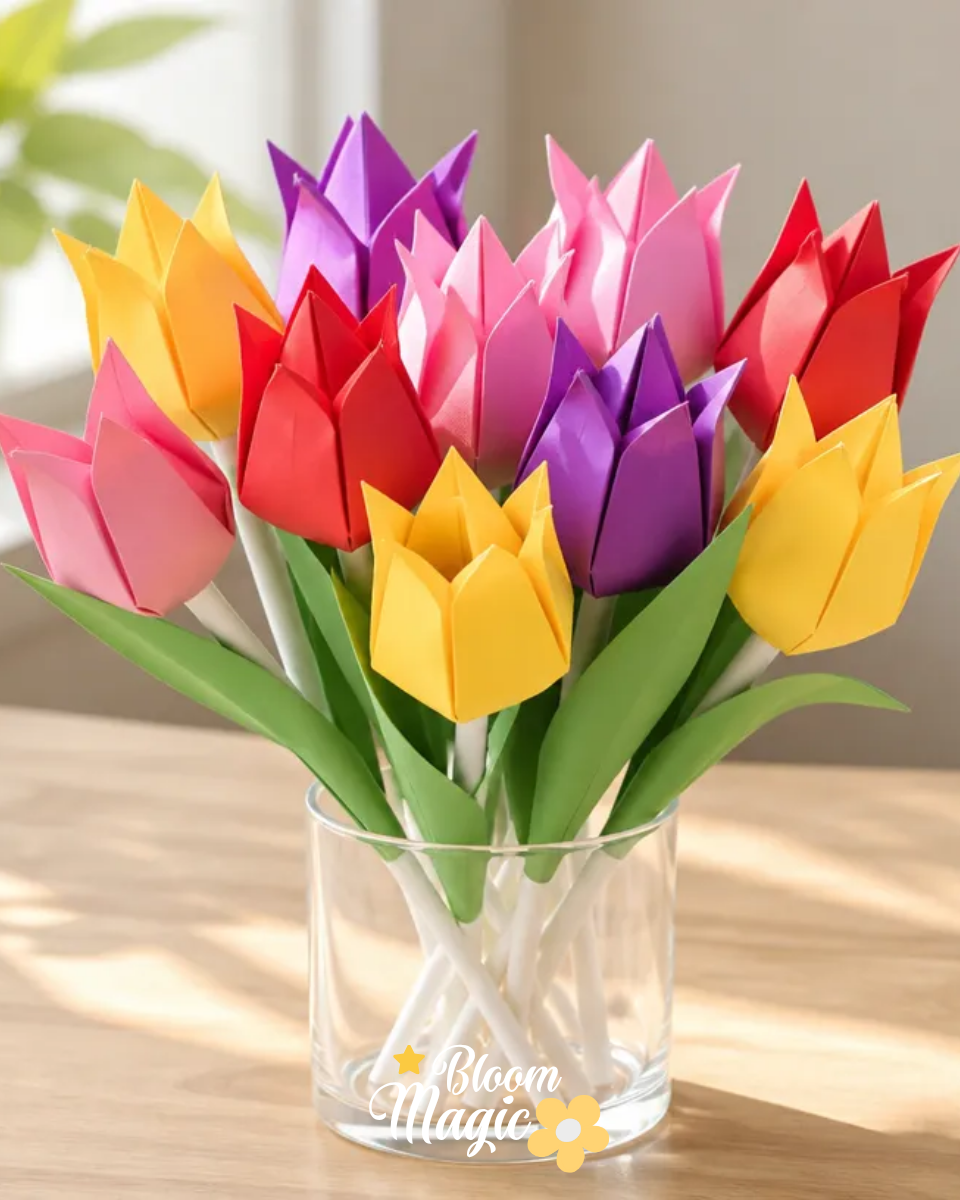
The moment I decided to infuse my space with flowers, I knew I needed a creative project that didn’t demand an overwhelming level of skill. Setting out a few colorful craft supplies, my thoughts drifted to a project that captures the essence of spring without the need for actual blooms. The Folded Paper Tulip Bouquet stands out as an accessible yet stunning craft that allows us to bring the joy of flowers into our home, without the concern of wilting petals or fading colors. This versatile project not only beautifies a corner of your space but also provides a delightful outlet for artistic expression. You may also find Pressed Flower Suncatcher Contact Paper useful.
Why This Folded Paper Tulip Bouquet Works So Well
You may also find Pressed Wedding Bouquet Frame useful.
The charm of the Folded Paper Tulip Bouquet lies in its simple yet captivating design. It’s approachable for crafters at any level, from beginners to seasoned DIY enthusiasts. The project enables you to manipulate basic materials into something visually rewarding. As you fold and arrange, you’ll find it manageable, making it ideal for a cozy afternoon spent creating. With the ability to customize each tulip, you can tailor the arrangement to suit your style, whether for personal décor or a thoughtful gift.
A Quick Look Before You Begin
Creating your tulip bouquet flows smoothly, guiding you through a straightforward process. First, you’ll gather your supplies, ensuring a relaxed crafting experience. The assembly combines folding techniques and color selection, allowing you to focus on creativity without a mess. This project works intuitively, letting you explore various textures and arrangements while keeping the mess level low. Best of all, if you make a mistake, adjustments are easy, making this craft especially forgiving.
Materials You’ll Need
- Colored paper: Choose vibrant colors for your tulip petals.
- Scissors: A sharp pair helps achieve clean edges when cutting shapes.
- Glue stick: This will securely attach your folded pieces.
- Floral wire or pipe cleaners: To give structure to your tulips.
- Green tape: Perfect for wrapping the floral stems and adding a polished look.
- Optional embellishments: Consider beads or stickers for added flair.
Whether you opt for traditional floral colors or experiment with more abstract designs, the material choices can enhance your flowers’ visual appeal.
Step-by-Step Directions
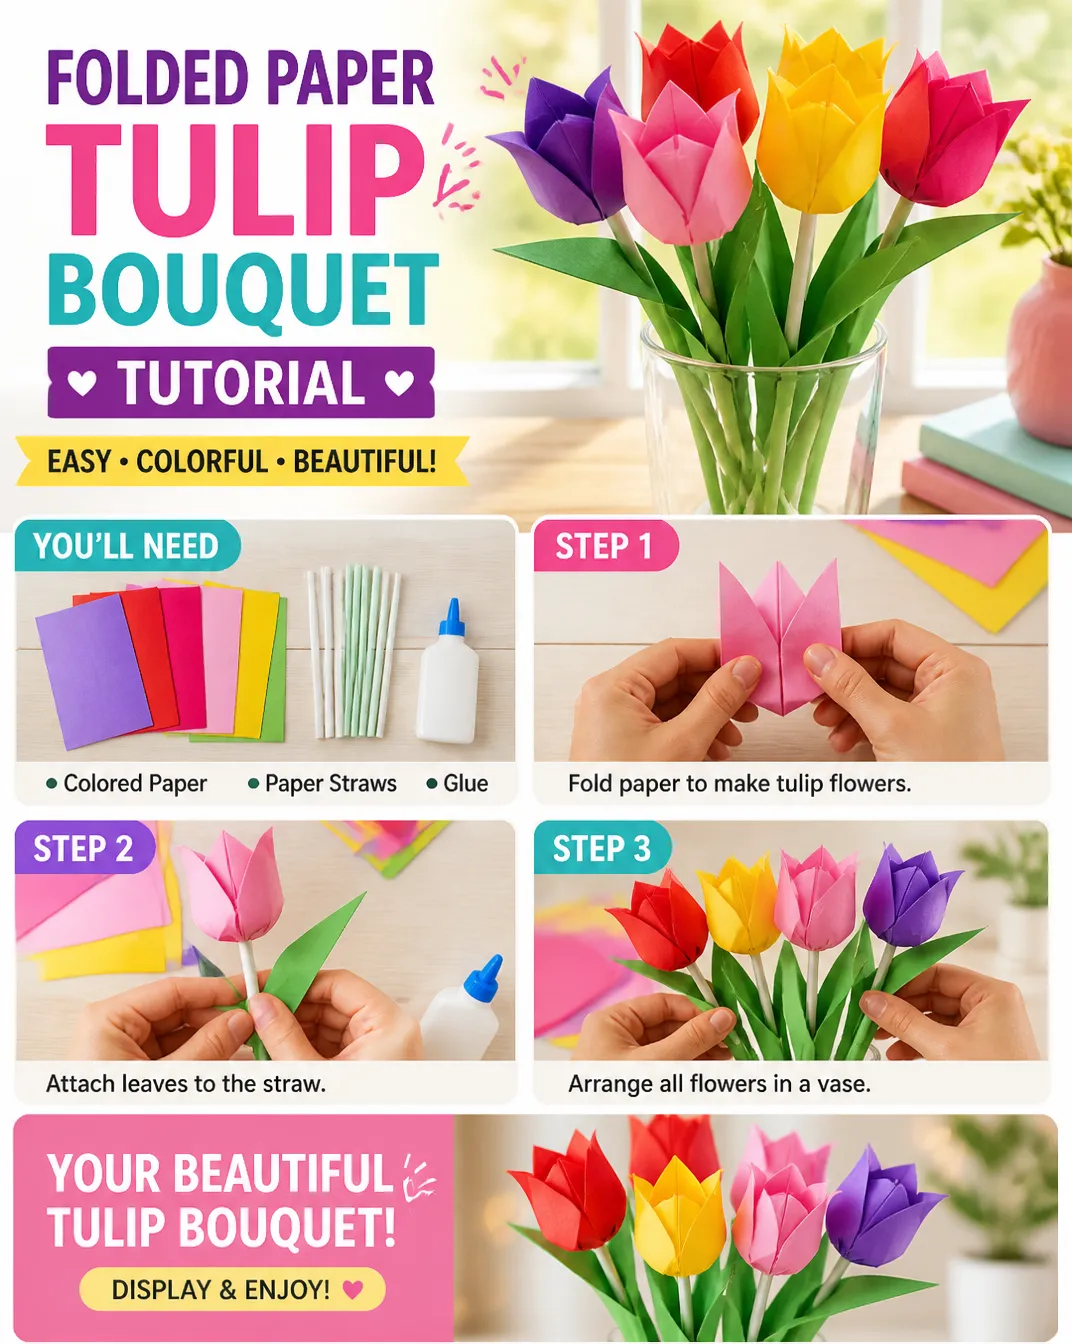
- Start by cutting your colored paper into squares. Aim for sizes around 6×6 inches for each tulip.
- Fold one square corner to the opposite corner to create a triangle. This serves as your base for shaping.
- Cut a rounded edge on the top of the triangle, allowing the tulip to bloom. Ensure both sides mirror each other for even petals.
- Open the triangle back out to reveal the shape you’ve created. It should resemble a heart more than a triangle.
- Gently fold back the edges to start shaping your tulip’s petals. Visualize how the petals will overlap and adjust accordingly.
- Use your glue stick to secure the edges of the petals together, maintaining the desired flower shape.
- Attach a piece of floral wire or pipe cleaner to the base, securing it with more glue and then wrapping with green tape to form the stem.
- Repeat these steps for each tulip to build your bouquet, varying colors and arrangements as you go along.
- Experiment with the height and angle of the tulip’s placement in your finished bouquet for a dynamic look.
- Finally, display your bouquet in a vase or a special spot in your home to showcase your lovely creation.
The Design Behind This Floral DIY
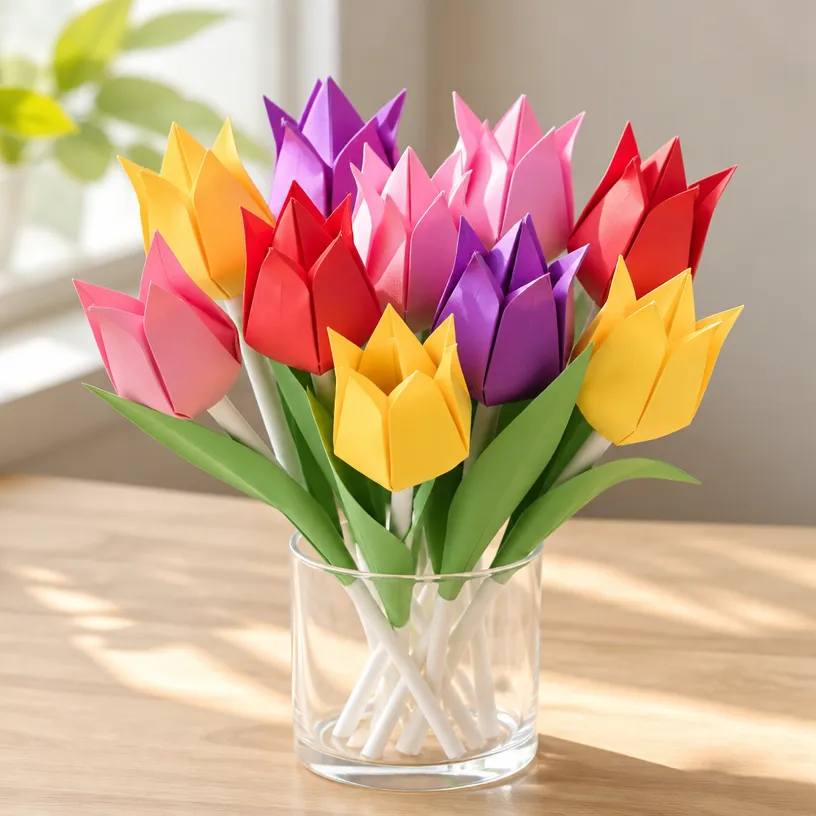
Color choice plays a crucial role in the Folded Paper Tulip Bouquet. The vibrant hues can evoke different emotions and bring energy to any space. When selecting colors, consider how they relate to each other; warm colors can create a striking contrast against cool shades. Pay attention to spacing between the tulips as you arrange them. A balanced look enhances their visual appeal, ensuring that the design feels cohesive rather than cluttered.
Layering adds depth to your bouquet, allowing each tulip to shine. Delicate petals folded gracefully create a sense of movement. Aim for variation in height and angles to keep the interest alive within your arrangement. By crafting each tulip consciously, you create a lush garden feel that feels lively yet controlled.
Troubleshooting Common Issues
At times, crafting can lead to challenges. If your tulips don’t sit right, they may have uneven placement. Take a moment to realign the stems for a more balanced look. Should the glue become visible, simply add embellishments or decorative tape to mask those areas. If petals seem too crowded, gently detach and re-position them until you’re satisfied with the overall look. Remember, crafting is about enjoying the process, and adjustments can contribute to a uniquely beautiful bouquet.
Easy Variations to Try
Here are a few ways to reinvent your Folded Paper Tulip Bouquet:
- Experiment with different paper textures, such as patterned or textured scrapbook paper.
- Create a seasonal bouquet by incorporating shades of orange and brown for autumn.
- Use pastel colors for a soft spring theme or vibrant, bold colors for a summer vibe.
- Combine tulips with other paper flowers like daisies or roses for mixed bouquets.
- Play with size variations, making some tulips larger than others for dynamic displays.
Displaying or Keeping Your Project
Once your bouquet is complete, think about how to display it. You can place it in a vase as a centerpiece or use it to brighten up a desk. If you want to gift your creation, consider wrapping it in clear cellophane for an elegant touch. Carefully handle your bouquet to avoid damage to the delicate petals. You can refresh your space by rotating it with other handmade crafts over time, reducing waste when transitioning between displays.
FAQs About Folded Paper Tulip Bouquet
Will this project last? While the Folded Paper Tulip Bouquet won’t wilt like real flowers, it’s best suited for short-term display. However, with gentle handling, it can last through the season.
Can I use different paper types? Yes, mixing different types of paper can add dimension to your bouquet. Just ensure that the paper can hold its shape when folded.
What if I misshape my petals? Don’t worry! Unlike flowers, paper is forgiving. You can trim or re-fold petals to achieve the desired shape.
Is there an easy way to store my bouquet? If you want to preserve your bouquet for a longer time, you can store it in a cool, dry place, possibly within a box to protect it from bending or breaking.
A Final Helpful Note
Embrace the creativity of the Folded Paper Tulip Bouquet project, focusing on the enjoyment of crafting rather than striving for perfection. This project is all about letting your unique style shine through. The beauty of these paper tulips lies in their individuality no two bouquets will ever be the same, just as no two crafting experiences mirror one another. Enjoy the process, stay flexible with your designs, and savor every moment as you create.
Conclusion
Crafting your own folded paper tulip bouquet is a delightful way to celebrate flowers without the worry of upkeep. You can find more inspiration through tutorials like this guide on making a paper tulip bouquet or explore this easy origami tulip tutorial which can further expand your floral crafting journey. Whether you’re keeping them for yourself or gifting them, these creative arrangements add warmth and charm to any setting.